Custom installation of the VirAmp AMI
Access http://aws.amazon.com/, in a Web browser.
Select ‘My Account/Console’ on the top right if you already have an account; otherwise sign up with a new account.
Go to the ‘AWS Management Console’ option, click the ‘EC2’ at upper left.
Before importing the AMI, make sure you are in the correct Availability zone. Amazon EC2 is hosted in multiple locations world-wide with multiple Availability zones, and resources cannot be replicated across regions until specified. Our AMI is stored in region “US East(N. Virginia)”. Check the upper right corner next to your account name, and make sure it’s set at the correct region. If not, just click and select the correct one from the dropdown menu.
Next, click the blue ‘Launch Instance’ button.
Step-1: Choosing the instance
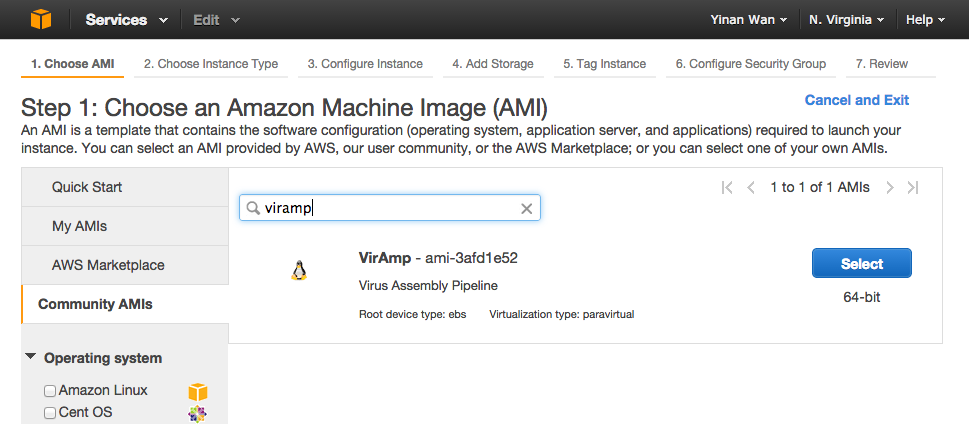
Click the Community AMIs tab at mid-left and simply search “Szpara_Viramp”
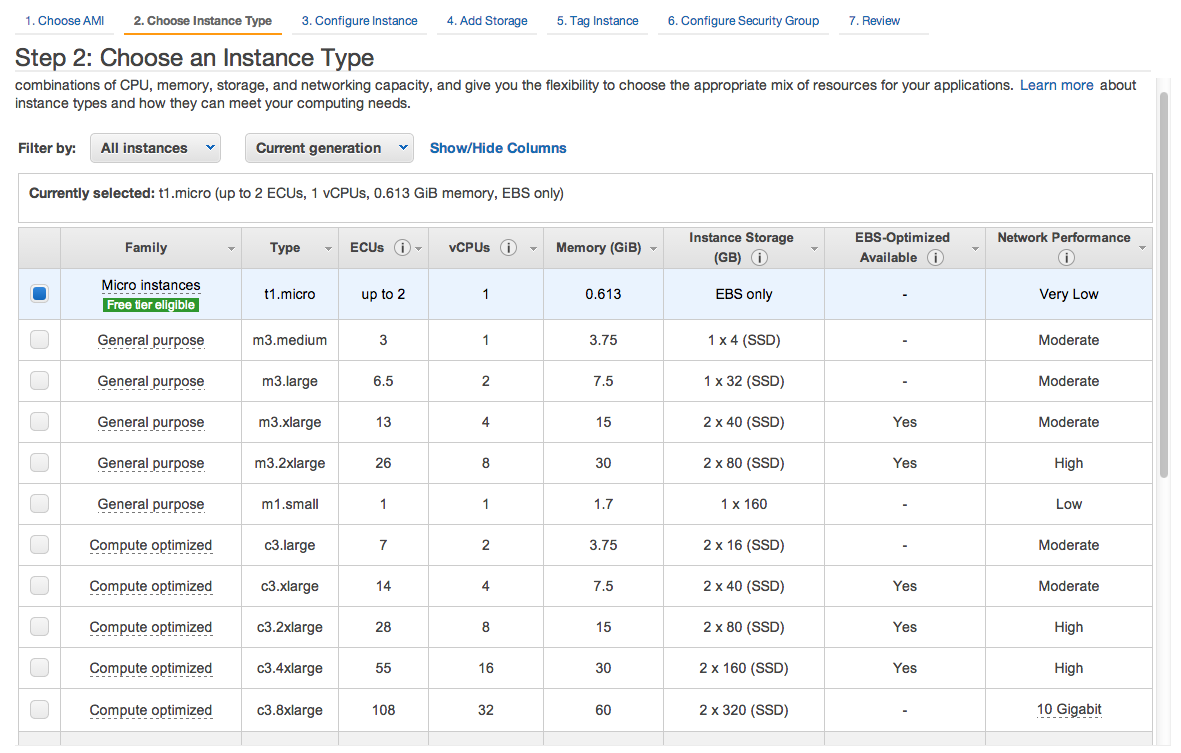
Step-2: Review Instance type
Due to storage and computational requirements, free tier instances are not usable with our AMI. For trial runs it is possible to choose smaller instance types, but for serious usage it is advised to select at least the m3.large (third option)
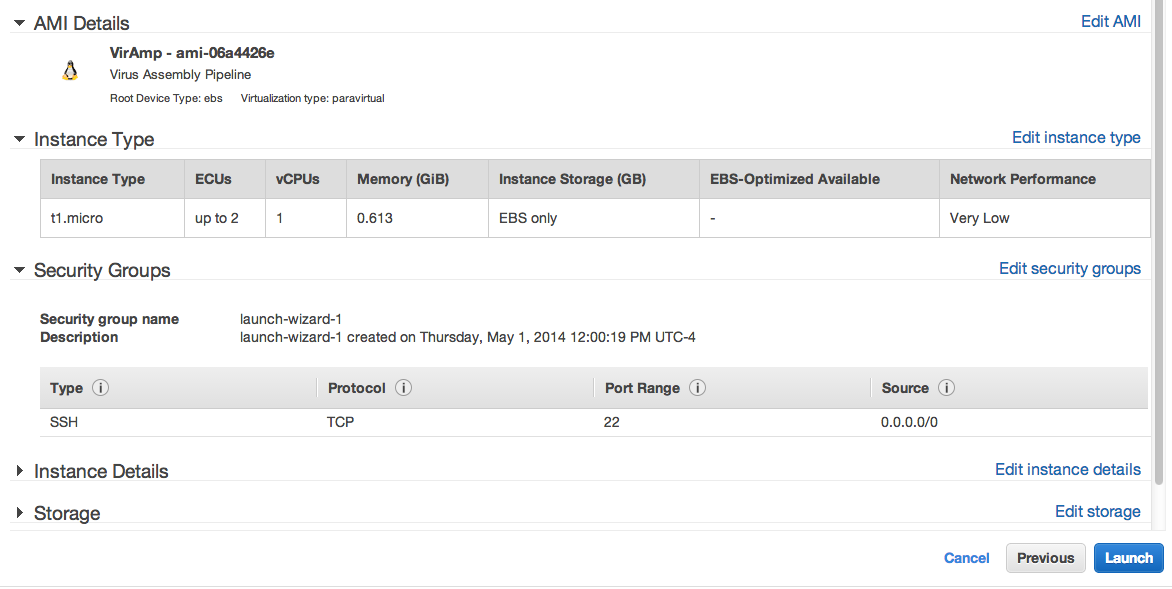
Step-3: Launch the Instance
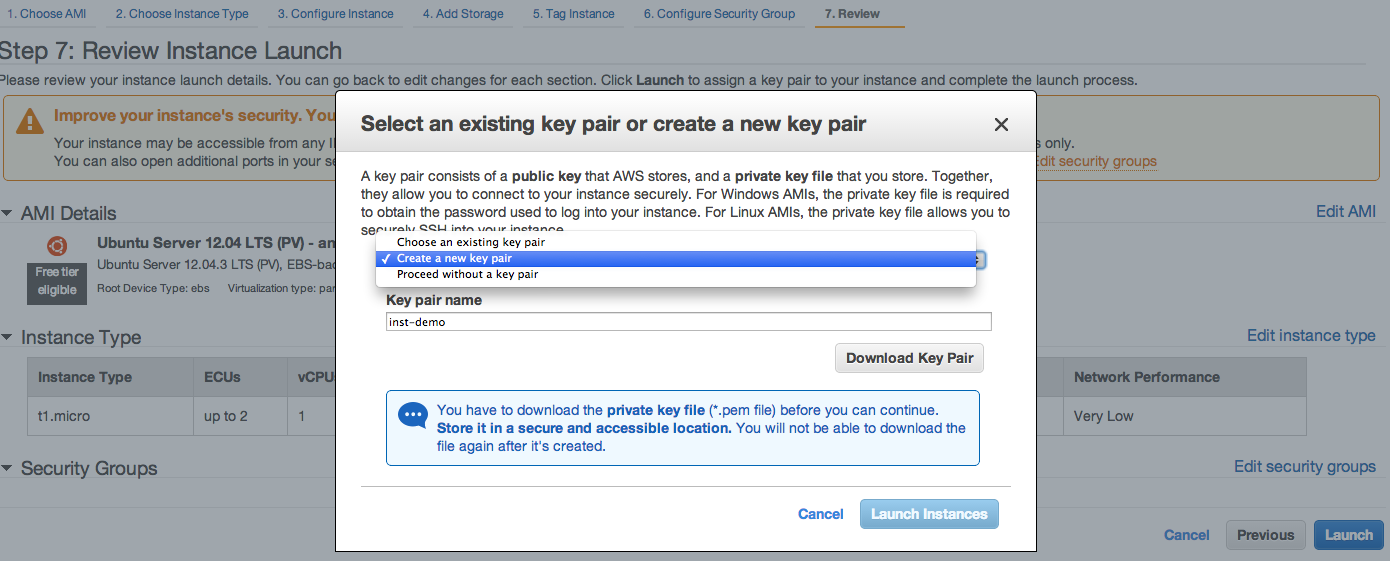
Step-4: Create Key-pairs
You have now successfully launched your own version of the instance. For information on logging in and starting your instance, please go to VirAmp instance login
Log in to the new instance
Instructions and an overview of the basic steps and parameters you need to login to the instance are provided at the console.
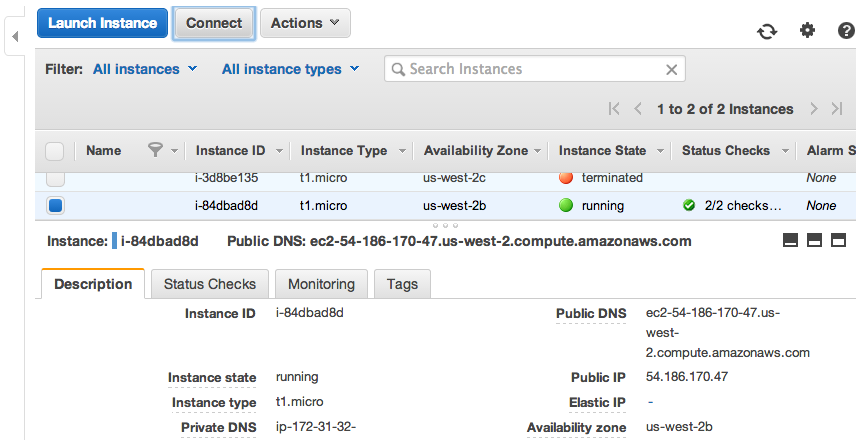
Hit the “Connect” button to view information you need to login to the backend of the system.
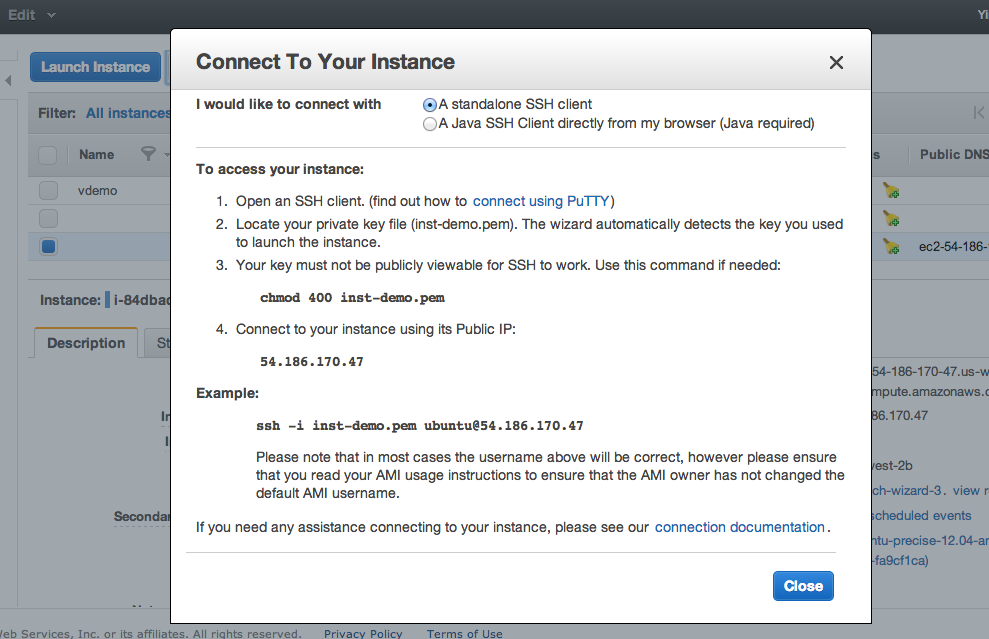
Start your terminal and type the following command:
chmod 400 myPemName.pem
Connect to your instance using your public IP:
ssh -i myPemName.pem ubuntu@public_IP
Change to the galaxy directory:
cd /mnt/galaxy/galaxy-dist/
Change viramp settings:
vi universe_wsgi.iniLine 596: admin_users = dwr19@psu.edu should be changed to reflect the current administrators email address Line 662: ftp_upload_site = viramp.com should be changed from viramp.com to your public ip address
Start the viramp server:
screen./run.shCTRL-a-d